Wednesday, October 7, 2009

Riveting the Rudder

Been a while since I've made any progress on the project. The new job has kept me busy. I managed to find a couple hours tonight to work on the rudder.

I finished riveting the counterbalance skin to the rib. I attached the counterweight. Then I clecoed the skins to the structure. Could not do any more riveting because Josh was sleeping.


Time spent: 2 hours (115 Total)

Saturday, September 12, 2009

Riveting Rudder Skeleton

Riveted together some of the rudder understructure. Began riveting the counterbalance skin to the counterbalance rib.

Time Spent: 4 hours (113 Total)

Monday, September 7, 2009

Finished Priming Rudder and Elevators

Long day. Prep, layed out parts, alumiprep, alodine, AZKO, packed up and cleaned up. Parts are back in the basement and cars are back in the garage. There were nearly 100 parts primed today. I don't think I'd want to do more than that in a single batch. Other than letting them dry before AZKO, it kept me pretty busy all day. Good news is this is the last time I have to prime until I get to the wings. On to riveting the rudder and elevators!

Time spent: 6 hours (109 Total)

Priming

It's my last day of freedom before I start a new job. If I don't prime the rest of my tail feathers now it will not get done before the weather turns frigid. Time for an all day primer fest!


Monday, August 3, 2009

Just One Pop Rivet

Received a few LP4-3 pop rivets from bobdobbs. Thanks Bob, that was fast! I came in late tonight so all I did was pull that last rivet. Ready to attach the rear spar.

Friday, July 31, 2009

More horizontal stabilizer work

Riveted more of the horizontal stabilizer.


Unfortunately I am short one LP4-3 pop rivet so I cannot yet attach the rear spar and finish the part. I put out a request to VAF for someone local with these rivets. Thankfully someone is going to mail me a couple and get me going again. Just another example of how great the RV community is!

Time spent: 1 hour (103 total)

Thursday, July 30, 2009

Riveted Horizontal Stabilizer

Riveted the left side of the HS together. Riveted most of the right side.


Just have to wrap up the right side and then put in the rear spar. Although, I seem to be short one pop rivet for one of the ribs. I also need a no-hole yoke to get a couple of the rivets near the leading edge. Pricey though... That will have to wait until I am employed.

Time spent: 6 hours (102 total)

Wednesday, July 29, 2009

Finished the Vertical Stabilizer!

As it turns out, I didn't really need the single offset rivet set to get into that tight spot. I had a bucking bar I used in the tight area and put the factory head on the easy to reach side. It was a little awkward, but it worked. I'm sure I'll encounter much worse.

I finished the vertical stabilizer. The skin is riveted on and the part is ready to go (minus the fiberglass tip). Feels good to finish one subassembly!


Time spent: 4 hours (96 total)

Wednesday, July 8, 2009

Riveted HS understructure

Riveted the rear spar assembly and the forward spar assembly. I could use a double offset rivet set to get the inboard most ribs riveted. I may have to order one. I wish I had thought of it when I ordered the single offset set. I'll see if the single offset set will do the job when it arrives.


Time spent: 3 hours (92 total)

Monday, July 6, 2009

Riveted VS understructure

Riveted the rear spar assembly and most of the ribs to the forward spar. I need a single offset rivet set to complete the understructure. I ordered one from Avery.

Time spent: 4 hours (89 total)

Saturday, July 4, 2009

Friday, July 3, 2009

Saturday, June 27, 2009

Built painting/drying screen

It's time to prime. I spent some time tonight getting my garage ready for priming. I built what's essentially an oversized cooling rack - the kind of thing you'd put cookies on to cool. It's approx. a 4x8 frame with chicken wire attached. Nothing fancy, but it will be very handy when I'm prepping and priming parts. It can be used for drying parts after alumiprep and alodine, and it can be used to hold parts while spraying AZKO. The hardest part was finding the darn box of screws I purchased for this.


Time spent: 2 hours (76 total)

Sunday, June 21, 2009

Trim tab

I took the plunge and bent the trim tab. I've read that some people have trouble bending the trailing edge, and most people have trouble with the bends in the inboard and outboard edges, so I've been putting this off for a while.

I built the trailing edge "bending brake" out of 2x6's and door hinges. I took my time and gradually finished the bend in the trailing edge. Came out great.

Then I built bending blocks to bend the tabs in the inboard and outboard edges. I decided to make my blocks out of an oak stair tread. I've heard it's best to use a hard wood for bending blocks, and a stair tread was a cheap way to get a piece of oak. I cut the blocks at the proper angle, used a roll-on glue to keep the blocks from sliding, and clamped the trim tab in place on the edge of my work bench.

I started with the inboard tabs. First the bottom, then the top. I really took my time working it with a rubber mallet and a piece of pine to soften the blow. Once I bent the tab as far as it would go, I used the mushroom set on the rivet gun to finish the bend. I set the pressure as low as it would go (just before it stopped hammering) and worked the seam back and forth. I am happy with the results.


Once I was done bending, I clamped the elevator hinge to the spar and drilled it in place. I trimmed the hinge on the trim tab side according to the plans. I clamped the control horn in place and drilled that to the trim tab. Final drilled all holes, deburred, dimpled, and countersunk as directed, and called it a night.


Time spent: 4 hours (74 total)

Wednesday, June 17, 2009

Dimpled and countersunk left elevator

Dimpled and countersunk the understructure according to the manual. Finished small tasks such as countersinking the counterweight and counterbalance skin, and adding bevels to the counterbalance skin. This time I believe I did the bevel correctly. It was supposed to go on the edge of the skin, not in the middle of the skin where the elevator skin overlaps it. I will probably have to order a new counterbalance skin as I probably created an unnecessary stress riser in the right counterbalance skin.

After finishing the understructure, I deburred and dimpled the holes in the left elevator skin.

Time spent: 3 hours (70 total)

Monday, June 15, 2009

Deburred edges of left elevator understructure

Short day in the workshop, but good to get something done. I deburred the edges of the left elevator understructure.

Time spent: 1 hour (67 total)

Saturday, June 6, 2009

Deburring

Deburred all holes in the left elevator understructure and stiffeners.

Time spent: 1 hour (66 total)

Trim servo

Worked on installing the trim servo. Read the manual that came with the servo. Clecoed the reinforcement plate to the elevator skin. Lined up the servo mounting brackets on the inspection plate according to the diagram. I placed the brackets 3/8" from the forward side of the inspection plate as instructed, but the assembly had to be moved slightly inboard of where the plans call for to get it lined up properly. I've read that other builders have had to do the same thing. I marked the holes, drilled, and clecoed the servo in place.

Here's the servo installed on the elevator:


The alignment looks pretty good:


I drilled the reinforcement plate to the elevator skin, and then disassembled the entire elevator for deburring, dimpling, and countersinking. Getting very close to "prime time".

Time spent: 2 hours (65 total)

Thursday, June 4, 2009

Right elevator work, skin is NOT defective

I heard back from Joe at Van's, and he said the offset hole is intentional. I tried once again to fit the ribs to the counterbalance skin and voila, it fit. It took a little bit of work to get the holes to line up, but they did. Doh! Next time I'll have to try harder before I assume a defective part.

I drilled the counterweight. It was much easier this time since I lubricated the drill and I stopped every few seconds to clean the lead shavings out of the drill bit.

I clecoed together the understructure, trimmed a few of the stiffeners a bit more (some need to be trimmed slightly shorter on this elevator), clecoed on the stiffeners, and clecoed the understructure to the elevator skin. Like the right elevator, I did not put the bend in the trailing edge yet, so I just clecoed the skin to the understructure one side at a time for drilling.


Final drilled the skins, the control horn, and any outstanding understructure holes.

At this point I decided to look at the trim servo assembly. The instructions are pretty vague on this topic - the only instructions in the manual are to "install the system according to your configuration" and "now would be a good time while there is sufficient access". Thare are some notes on the diagram, but not much. I read ahead in the empennage manual for any more instruction and did not find any. I'm going to assume that now is the time to install the reinforcement plate, the inspection plate, and the servo.

Here's where the servo goes on the underside of the right elevator:


Here is how it attaches to the inspection plate:


And here is how the unit will look once installed:


Time spent: 3.5 hours (63 total)

Monday, June 1, 2009

Elevators, found another defect

I got a shipment from Avery Tools that included a handy little dimple die set that uses a finish nail and a pull riveter to make dimples in really tight places. I used it to dimple some of the holes in the really tight spots on the inboard and outboard ribs. It still takes a bit of doing to get this tool in place - the nail has to be able to make the angle to go through the hole. I ground down one nail to make it easier.

I finished deburring, dimpling, and countersinking the right elevator.

I started work on the right elevators. Before too long I discovered another mispunched hole, this time on a counterbalance skin:


The corresponding hole on the other side was off as well:


I sent an email to Joe at Van's to see if they'll replace this skin. The last time this happened I simply put the rudder on hold and moved on to the next assembly. Tomorrow I'll see if I can move on to the trim tab. If not I may be stuck until the replacement arrives.

Time spent: 1.5 hours (59.5 total)

Thursday, May 28, 2009

More right elevator work

Finished dimpling the right elevator skin with the DRDT-2 and deburred the edges. Deburred and dimpled the counterweight skin, the stiffeners, and a couple of ribs.

I beveled the counterweight skin at the lap joint with the elevator skin as instructed in the manual. It wasn't obvious what the manual was asking me to do, so I dug up some posts on VAF. Basically it's just putting a notch in the counterweight skin so that the elevator skin will rest into it instead of laying entirely on top of it. I will also roll the elevator skin when my edge roller arrives. Upon reading further, I believe I'm actually supposed to taper the edge of the counterbalance skin so that it's not a sharp bump for the elevator skin to sit on. What I did doesn't hurt, but it's probably not necessary if the lap joint is rolled properly.

Trimmed the lead counterweight according to the diagram (though I can't seem to find a reference to do so in the manual). Used the drill press to drill a radius at the specified place and used the bandsaw to cut to the hole.

Spent some time reading ahead in the manual. I feel I'm getting close to "prime time". Can't wait to start riveting everything together. I bet it's going to go together very fast from then on.

Time spent: 3 hours (58 total)

Wednesday, May 27, 2009

Right elevator work

I drilled the two counterweight attach holes to full size. I finished assembling the understructure and I clecoed it in place with the elevator skin.

According to the plans, I should have already riveted the stiffeners on and I should have finished the bend in the trailing edge of the skin. However, since I am aiming to prime all the parts at once, I have not yet riveted the stiffeners on, and so I cannot finish the bend in the trailing edge or else I fear I will be unable to reach in there and buck those rivets. Instead of clecoing the whole skin to the understructure, I just did one side at a time (top, then bottom). It should have no impact on the quality of work.

I match drilled the skin to the understructure, and finished match drilling any remaining holes in the understructure. I disassembled the elevator, dimpled the counterweight skin for #10 screws, and countersunk the counterweight to accept the dimpled skin.

I deburred all the holes in the elevator skin (except the leading edge and the tip fairing attach holes which I assume will be drilled later). I dimpled all of the holes in the skin that I could reach with my hand squeezer.

Time spent: 3.5 hours (55 total)

Tuesday, May 26, 2009

Deburred and dimpled rudder skins, started right elevator

Deburred the other rudder skin and dimpled both skins. Edge deburred both skins.


Began work on the right elevator. Clecoed the stiffeners A-G.


Attached and drilled the reinforcement plates to the spar. Drilled the outboard rib to the counterweight rib, attached the counterweight and counterweight skin, and clecoed in place. I pilot drilled the two attach holes in the counterweight. I wish I had read the instructions more carefully and used a drill lubricant when drilling through the lead. I burned through two drill bits, and I think I may have burned out my drill chuck. Oh well, at least I didn't screw up the part.

Time spent: 8 hours (59.5 total)

Sunday, May 24, 2009

Rudder work, edge finished last evelator stiffener

I finished deburring the holes of the rudder understructure, including all of the stiffeners. I deburred all of the edges, and then dimpled as much of the understructure as I could. I'm going to need a special tool to dimple the really tight places on two of the ribs.

While I was at it, I deburred and edge finished the last bundle of elevator stiffeners.

Later Stacey came down and helped me remove the plastic from the rudder skins. I deburred all of the holes of one of the rudder skins.

Time spent: 4.5 hours (51.5 total)

Friday, May 22, 2009

Rudder disassembly

Finished drilling the rudder skins and skeleton. Disassembled the rudder. Deburred most of the holes in the skeleton.

Time spent: 1.5 hours (47 total)

Thursday, May 21, 2009

New rudder skin arrives, continued rudder

The new left rudder skin arrived from Van's. This one was free of the defect I found in the skin that came with the kit.

I match drilled all of the stiffeners to the skin and clecoed the skin in place. I then built the two lower fairing attach strips, clamped them in place and drilled them.


Time spent: 2 hours (45.5 total)

Tuesday, May 19, 2009

Deburred and edge finished elevator stiffeners

I ran five of the seven stiffener bundles through the scotchbrite wheel to round the corners and debur the edges.

Time spent: 1.5 hours (43.5 total)

Trimmed elevator stiffeners

Trimmed all of the elevator stiffeners. Like the rudder, four or five stiffeners are cut from any given piece of angle. Van's is kind enough to punch holes in the material to indicate where cuts should be made. This makes trimming a very simple process. However, the part numbers are a little ambiguous. For example, the part labeled as "DEFG" contains four stiffeners of different length (presumably parts D, E, F, and G). However, I'm not yet positive which is which. I'll just have to make an educated guess (maybe they're in alphabetic order from left to right) and make sure they all fit properly to the skins.

Time spent: 2 hours (42 total)

Monday, May 18, 2009

Finished deburring, dimpling, and countersinking HS

I completed deburring, dimpling, and countersinking the remainder of the HS. The HS is now ready for prime time.

Time spent: 3 hours (40 total)

Saturday, May 16, 2009

Deburred, dimpled, and countersunk HS

Spent some time dimpling, deburring, and countersinking the HS. Rather than simply countersinking the skeleton, I dimpled first and then added a little countersink to each dimpled hole. This yielded much better results than merely countersinking .032 as I did on the VS. According to specs, it is technically ok to countersink a 3/32" hole in .032 aluminum, but in reality it enlarges the holes, so I'll keep on using this process of dimple then light countersink.

Today I finished the left skin and most of the ribs.

Time spent: 2 hours (37 total)

VS and HS work

Deburred, dimpled, and countersunk the rest of the VS skeleton. The VS is officially ready for primer.

Disassembled the HS. Used the soldering iron and straight edge to remove the protective plastic from the rivet hole runs on the HS skins.

Time spent: 3 hours (35 total)

Friday, May 15, 2009

Match drilled right HS skin

Match drilled the right skin onto the HS skeleton. HS is now ready for disassembly, deburring, dimpling, and countersinking.

Time spent: 30 min (32 hours total)

Thursday, May 14, 2009

Replacement rib arrives, continued HS work

The replacement HS rib arrived today, so I decided to go back and pick up where I left off on the HS. I was more careful this time about drilling the rib to the spars and it came out much better - even better than the left rib. After fitting the rib in place, I attached the skin, marked the holes on the inboard most ribs, fluted them, reinstalled them, and drilled them in place. I got a late start, so I had to stop here. No pictures - it's the same as the left side.

Today I received a shipment of used clecoes from Jim D. 200 each of 3/32" and 1/8". Timing couldn't have been better as most of mine are tied up on the rudder awaiting a new left skin.

Time spent: 1.5 hours (31.5 total)

Deburred, dimpled, and countersunk VS

I've done all I can with the rudder until the new skin arrives, and I've done all I can with the HS until the replacement rib arrives (should be here tomorrow). Rather than starting the elevators, I decided to make some progress on the VS.

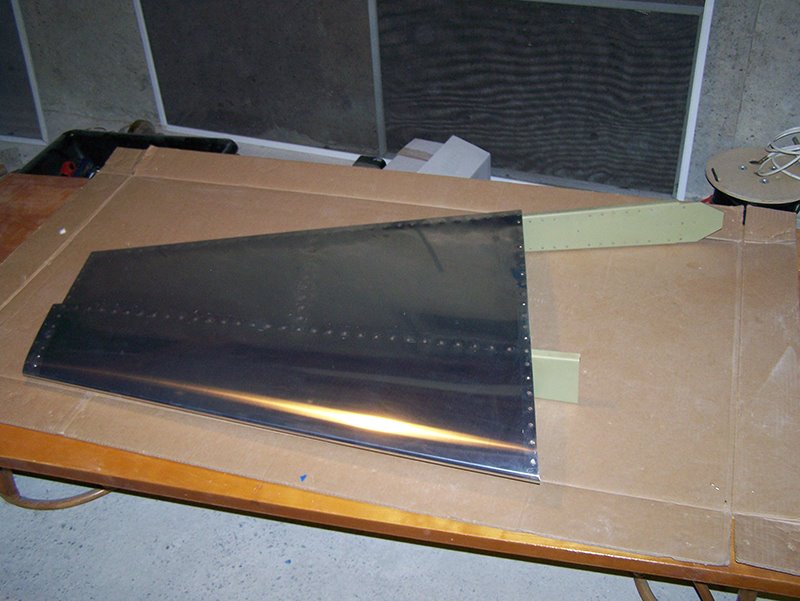
I started by using the old "soldering iron and a straight edge" trick to remove the vinyl from the rivet hole runs on the VS skin. This technique allows me to keep the protective plastic on as much of the skin as possible.

I deburred and then dimpled all of the holes (except for the holes that attach the fiberglass fairing). I used a hand squeezer on the edges and used the DRDT-2 on the inside holes.


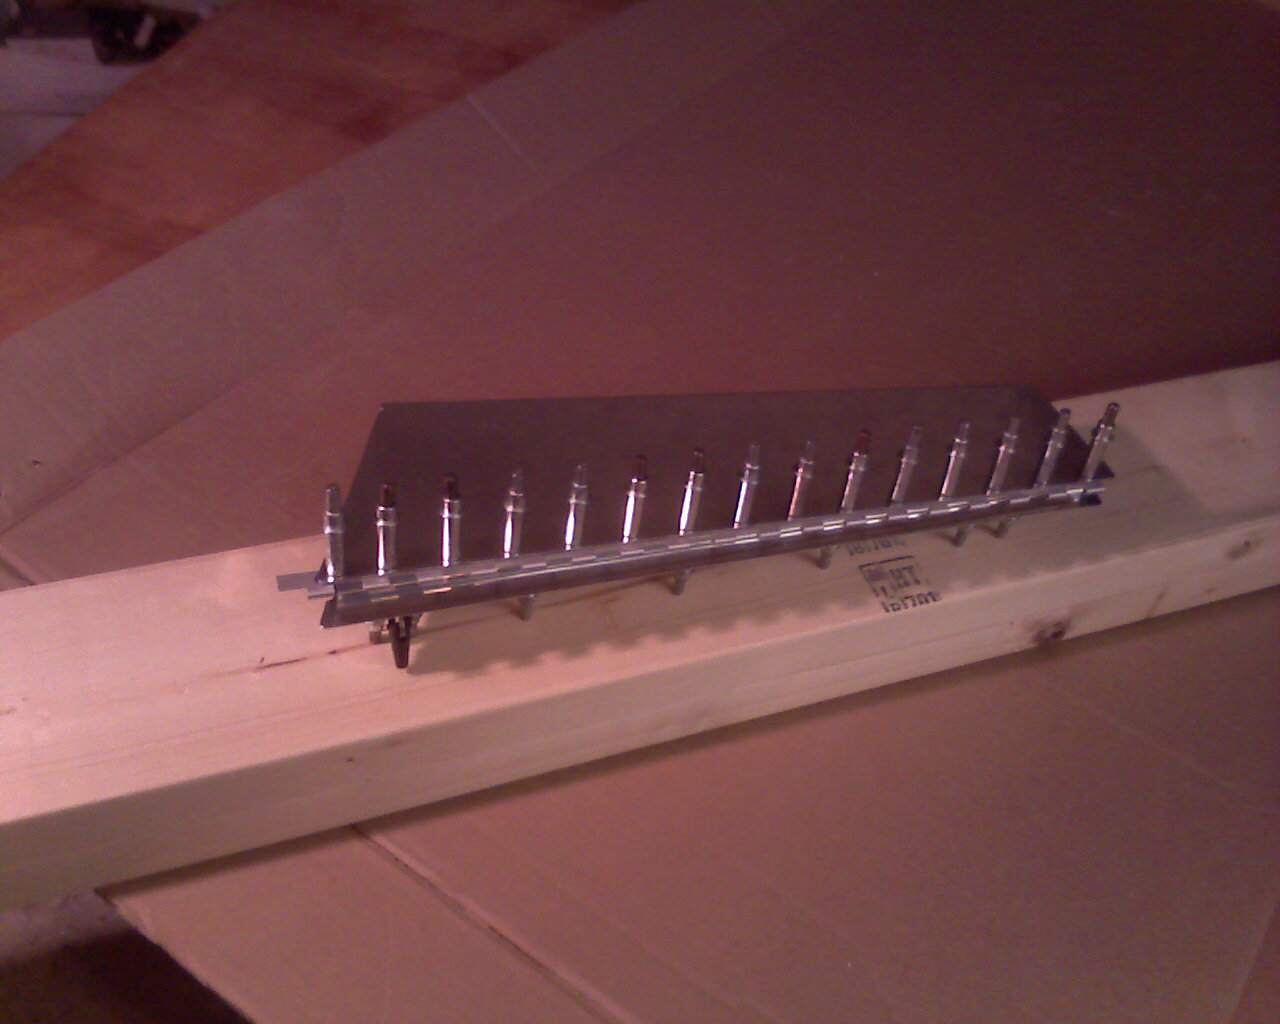
Here's a shot of the DRDT-2. I don't have it bolted down yet, but this setup was good enough to dimple the VS skin. I'll probably have to build a workbench around it when I get to the wings. It's a really great tool. It saves me the trouble of swinging a mallet, it's much quieter than the average C-Frame, and it seems less likely to cause an "oops".


Once I was done with the skin, I deburred, dimpled, and countersunk the rear VS spar.

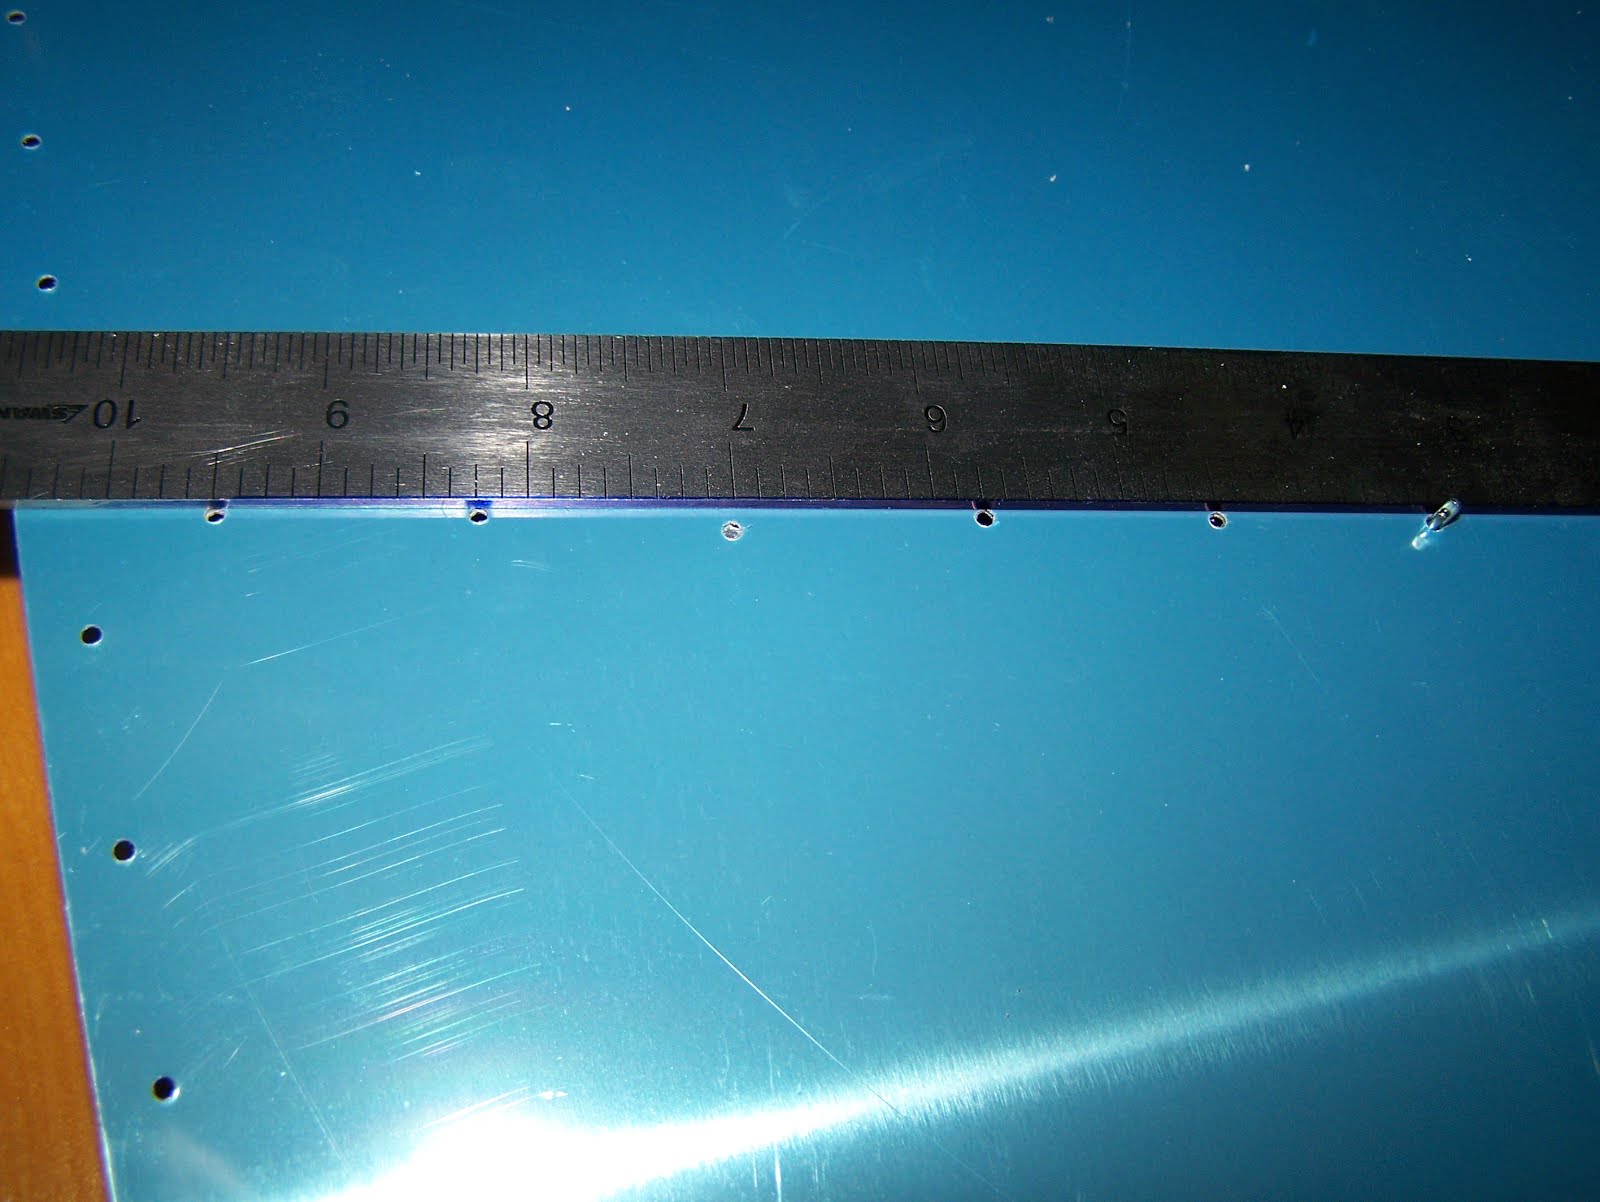
These holes had to be dimpled to install flush rivets:


These holes were countersunk to accept the dimpled skin. I seem to have enlarged the holes a little bit, but not so much that they are unusable. I just need to be careful when I squeeze these rivets.


When I was done with the rear spar, I worked on the rear spar reinforcement plate. I countersunk these holes to accept the dimpled holes in the spar.


To finish deburring this part I need to use the grinder and the Dremel. It's getting late and that would make too much noise, so I'll pick this up tomorrow.

Time spent: 3 hours (30 total)

Tuesday, May 12, 2009

Rudder skeleton

Assembled the rudder skeleton. Clecoed the counterbalance skin in place, clecoed the right rudder stiffeners back on the right skin, and clecoed the right skin in place.


Final drilled all of the holes I could. Trimmed and attached the angular brace at the bottom forward corner of the rudder. Final drilled the brace to the structure.


Joe from Van's read my email regarding the defect in the left rudder skin, and he also saw my post on VAF. He is sending me a new skin. I will put the rudder assembly aside as is (soon I should have enough clecoes to spare these) and pick this up when the new skin comes.

Time spent: 2 hours (27 total)

Monday, May 11, 2009

Rudder skin defect

Called Van's today and spoke with a tech counselor. He was surprised to hear that I have just one hole out of alignment - usually it's an entire pattern. He suggested that I abandon this hole and drill two new holes on either side of the bad hole. Later I can use proseal to fill in the bad hole. I'm not sure if I want to go that route or see if Van's will ship me a new skin. I posted a thread on VAF to get some feedback on the situation. No work on the plane tonight.

Sunday, May 10, 2009

Rudder stiffeners, found a defect

I finished fabricating the rudder stiffeners. Each stiffener had to be trimmed to length. As you go from bottom to top, each stiffener is shorter than the next. I used the tin snips to trim, and used the scotch brite wheel to round the edges and debur. Here are the stiffeners laid out on the left rudder skin:


I match drilled the stiffeners to the right skin and put everything aside, making sure to bundle and mark the right stiffeners so they do not get mixed up with the left ones.

I started match drilling the left skin to the stiffeners when I encountered the following prepunched hole pattern:


You can see clearly that the hole near the 7" mark on the ruler is out of alignment. Here is a shot from the other side:


Unfortunately this is a blocking issue. The hole in the skin does not line up with the hole in the stiffener. I sent an email to Van's with a detailed description of the problem. I am hoping they will send me a new skin with the correct hole pattern. It looks like I'll have to put the left rudder skin aside for now pending what I hear from Van's.

I can try to move on to the rudder skeleton, and my replacement rib for the HS should arrive this week, so I should be able to get back to that.

Time spent: 2 hours (25 total)

Saturday, May 9, 2009

Finished tapering rudder stiffeners

Finished tapering the rudder stiffeners. Placed the stiffeners on the rudder skins. The forward side of the stiffeners need to be trimmed to length.

Time spent: 30 min (23 hours total)

Friday, May 8, 2009

Match drilled VS, cut rudder stiffeners

I match drilled the VS, disassembled it, and put it aside. I will debur, dimple, and countersink the parts along with everything else.

Began cutting the rudder stiffeners. There are 16 in all (8 pieces cut in half) and the ends closest to the rudder's trailing edge need to be tapered.

Time spent: 2 hours (22.5 total)

HS work and started VS

Good stuff tonight. I finished drilling the left side of the HS, removed the skin, and put the assembly aside. I had to steal some clecoes from the outboard side to finish drilling the inboard ribs.

I don't want to start the right side until my replacement rib arrives (should get here on May 14th), so I put the HS on hold and started work on the VS.

I can't believe how quickly the VS went together compared to the HS. I fluted the ribs and assembled the skeleton.


Then I attached the skin.


It was getting late so I thought I'd stop there. However, I after reading a post on VAF I thought it would be a good time to organize my hardware. I purchased a plastic storage container a long time ago specifically for this.


You can see I've organized the rivets by type, diameter, and length. The pop rivets are just in random order along the top, and I found it nearly impossible to figure out a good organization scheme for the various nuts and bolts that were merely labeled "Misc Empennage Hardware". Oh well, it's still better than looking for hardware in little paper bags.

Time spent: 5 hours (20.5 total)