Showing posts with label vertical stabilizer. Show all posts

Wednesday, July 29, 2009

Finished the Vertical Stabilizer!

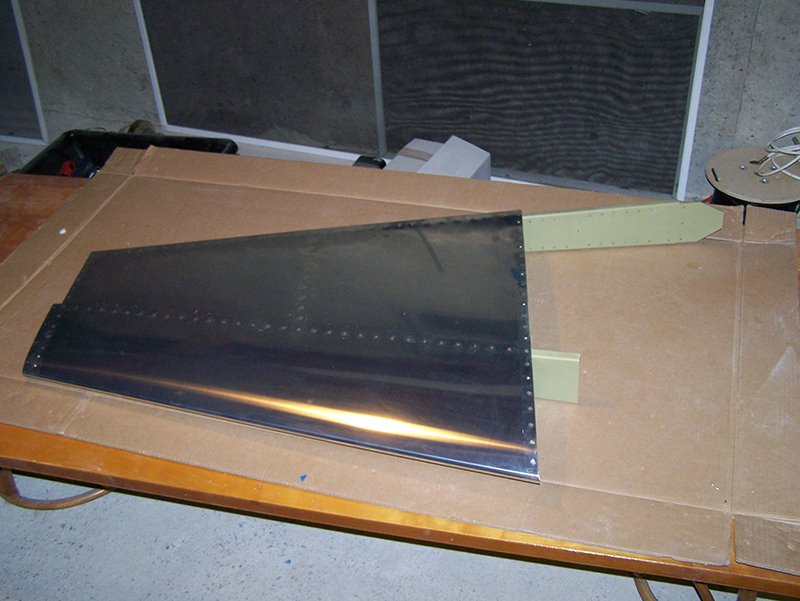
As it turns out, I didn't really need the single offset rivet set to get into that tight spot. I had a bucking bar I used in the tight area and put the factory head on the easy to reach side. It was a little awkward, but it worked. I'm sure I'll encounter much worse.

I finished the vertical stabilizer. The skin is riveted on and the part is ready to go (minus the fiberglass tip). Feels good to finish one subassembly!


Time spent: 4 hours (96 total)

Monday, July 6, 2009

Riveted VS understructure

Riveted the rear spar assembly and most of the ribs to the forward spar. I need a single offset rivet set to complete the understructure. I ordered one from Avery.

Time spent: 4 hours (89 total)

Saturday, July 4, 2009

Friday, July 3, 2009

Saturday, May 16, 2009

VS and HS work

Deburred, dimpled, and countersunk the rest of the VS skeleton. The VS is officially ready for primer.

Disassembled the HS. Used the soldering iron and straight edge to remove the protective plastic from the rivet hole runs on the HS skins.

Time spent: 3 hours (35 total)

Thursday, May 14, 2009

Deburred, dimpled, and countersunk VS

I've done all I can with the rudder until the new skin arrives, and I've done all I can with the HS until the replacement rib arrives (should be here tomorrow). Rather than starting the elevators, I decided to make some progress on the VS.

I started by using the old "soldering iron and a straight edge" trick to remove the vinyl from the rivet hole runs on the VS skin. This technique allows me to keep the protective plastic on as much of the skin as possible.

I deburred and then dimpled all of the holes (except for the holes that attach the fiberglass fairing). I used a hand squeezer on the edges and used the DRDT-2 on the inside holes.


Here's a shot of the DRDT-2. I don't have it bolted down yet, but this setup was good enough to dimple the VS skin. I'll probably have to build a workbench around it when I get to the wings. It's a really great tool. It saves me the trouble of swinging a mallet, it's much quieter than the average C-Frame, and it seems less likely to cause an "oops".


Once I was done with the skin, I deburred, dimpled, and countersunk the rear VS spar.

These holes had to be dimpled to install flush rivets:


These holes were countersunk to accept the dimpled skin. I seem to have enlarged the holes a little bit, but not so much that they are unusable. I just need to be careful when I squeeze these rivets.


When I was done with the rear spar, I worked on the rear spar reinforcement plate. I countersunk these holes to accept the dimpled holes in the spar.


To finish deburring this part I need to use the grinder and the Dremel. It's getting late and that would make too much noise, so I'll pick this up tomorrow.

Time spent: 3 hours (30 total)

Friday, May 8, 2009

Match drilled VS, cut rudder stiffeners

I match drilled the VS, disassembled it, and put it aside. I will debur, dimple, and countersink the parts along with everything else.

Began cutting the rudder stiffeners. There are 16 in all (8 pieces cut in half) and the ends closest to the rudder's trailing edge need to be tapered.

Time spent: 2 hours (22.5 total)

HS work and started VS

Good stuff tonight. I finished drilling the left side of the HS, removed the skin, and put the assembly aside. I had to steal some clecoes from the outboard side to finish drilling the inboard ribs.

I don't want to start the right side until my replacement rib arrives (should get here on May 14th), so I put the HS on hold and started work on the VS.

I can't believe how quickly the VS went together compared to the HS. I fluted the ribs and assembled the skeleton.


Then I attached the skin.


It was getting late so I thought I'd stop there. However, I after reading a post on VAF I thought it would be a good time to organize my hardware. I purchased a plastic storage container a long time ago specifically for this.


You can see I've organized the rivets by type, diameter, and length. The pop rivets are just in random order along the top, and I found it nearly impossible to figure out a good organization scheme for the various nuts and bolts that were merely labeled "Misc Empennage Hardware". Oh well, it's still better than looking for hardware in little paper bags.

Time spent: 5 hours (20.5 total)