Long day. Prep, layed out parts, alumiprep, alodine, AZKO, packed up and cleaned up. Parts are back in the basement and cars are back in the garage. There were nearly 100 parts primed today. I don't think I'd want to do more than that in a single batch. Other than letting them dry before AZKO, it kept me pretty busy all day. Good news is this is the last time I have to prime until I get to the wings. On to riveting the rudder and elevators!
Time spent: 6 hours (109 Total)
Showing posts with label trim system. Show all posts
Showing posts with label trim system. Show all posts
Monday, September 7, 2009


Priming
It's my last day of freedom before I start a new job. If I don't prime the rest of my tail feathers now it will not get done before the weather turns frigid. Time for an all day primer fest!


Sunday, June 21, 2009
Trim tab
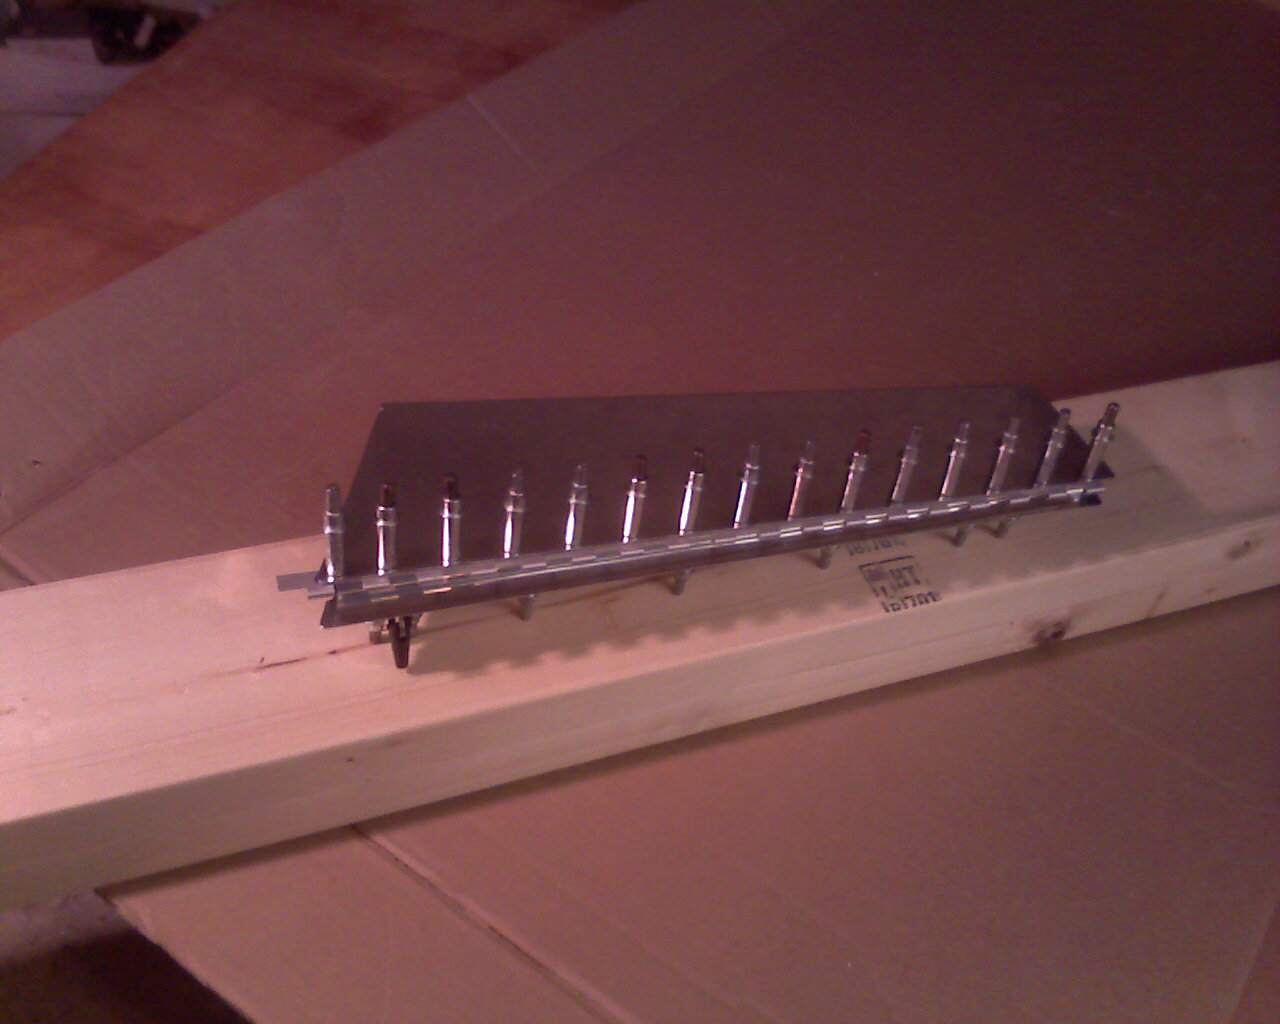
I took the plunge and bent the trim tab. I've read that some people have trouble bending the trailing edge, and most people have trouble with the bends in the inboard and outboard edges, so I've been putting this off for a while.
I built the trailing edge "bending brake" out of 2x6's and door hinges. I took my time and gradually finished the bend in the trailing edge. Came out great.
Then I built bending blocks to bend the tabs in the inboard and outboard edges. I decided to make my blocks out of an oak stair tread. I've heard it's best to use a hard wood for bending blocks, and a stair tread was a cheap way to get a piece of oak. I cut the blocks at the proper angle, used a roll-on glue to keep the blocks from sliding, and clamped the trim tab in place on the edge of my work bench.
I started with the inboard tabs. First the bottom, then the top. I really took my time working it with a rubber mallet and a piece of pine to soften the blow. Once I bent the tab as far as it would go, I used the mushroom set on the rivet gun to finish the bend. I set the pressure as low as it would go (just before it stopped hammering) and worked the seam back and forth. I am happy with the results.


Once I was done bending, I clamped the elevator hinge to the spar and drilled it in place. I trimmed the hinge on the trim tab side according to the plans. I clamped the control horn in place and drilled that to the trim tab. Final drilled all holes, deburred, dimpled, and countersunk as directed, and called it a night.

Time spent: 4 hours (74 total)
I built the trailing edge "bending brake" out of 2x6's and door hinges. I took my time and gradually finished the bend in the trailing edge. Came out great.
Then I built bending blocks to bend the tabs in the inboard and outboard edges. I decided to make my blocks out of an oak stair tread. I've heard it's best to use a hard wood for bending blocks, and a stair tread was a cheap way to get a piece of oak. I cut the blocks at the proper angle, used a roll-on glue to keep the blocks from sliding, and clamped the trim tab in place on the edge of my work bench.
I started with the inboard tabs. First the bottom, then the top. I really took my time working it with a rubber mallet and a piece of pine to soften the blow. Once I bent the tab as far as it would go, I used the mushroom set on the rivet gun to finish the bend. I set the pressure as low as it would go (just before it stopped hammering) and worked the seam back and forth. I am happy with the results.


Once I was done bending, I clamped the elevator hinge to the spar and drilled it in place. I trimmed the hinge on the trim tab side according to the plans. I clamped the control horn in place and drilled that to the trim tab. Final drilled all holes, deburred, dimpled, and countersunk as directed, and called it a night.
Time spent: 4 hours (74 total)
Saturday, June 6, 2009
Trim servo
Worked on installing the trim servo. Read the manual that came with the servo. Clecoed the reinforcement plate to the elevator skin. Lined up the servo mounting brackets on the inspection plate according to the diagram. I placed the brackets 3/8" from the forward side of the inspection plate as instructed, but the assembly had to be moved slightly inboard of where the plans call for to get it lined up properly. I've read that other builders have had to do the same thing. I marked the holes, drilled, and clecoed the servo in place.
Here's the servo installed on the elevator:

The alignment looks pretty good:

I drilled the reinforcement plate to the elevator skin, and then disassembled the entire elevator for deburring, dimpling, and countersinking. Getting very close to "prime time".
Time spent: 2 hours (65 total)
Here's the servo installed on the elevator:

The alignment looks pretty good:

I drilled the reinforcement plate to the elevator skin, and then disassembled the entire elevator for deburring, dimpling, and countersinking. Getting very close to "prime time".
Time spent: 2 hours (65 total)
Thursday, June 4, 2009
Right elevator work, skin is NOT defective
I heard back from Joe at Van's, and he said the offset hole is intentional. I tried once again to fit the ribs to the counterbalance skin and voila, it fit. It took a little bit of work to get the holes to line up, but they did. Doh! Next time I'll have to try harder before I assume a defective part.
I drilled the counterweight. It was much easier this time since I lubricated the drill and I stopped every few seconds to clean the lead shavings out of the drill bit.
I clecoed together the understructure, trimmed a few of the stiffeners a bit more (some need to be trimmed slightly shorter on this elevator), clecoed on the stiffeners, and clecoed the understructure to the elevator skin. Like the right elevator, I did not put the bend in the trailing edge yet, so I just clecoed the skin to the understructure one side at a time for drilling.

Final drilled the skins, the control horn, and any outstanding understructure holes.
At this point I decided to look at the trim servo assembly. The instructions are pretty vague on this topic - the only instructions in the manual are to "install the system according to your configuration" and "now would be a good time while there is sufficient access". Thare are some notes on the diagram, but not much. I read ahead in the empennage manual for any more instruction and did not find any. I'm going to assume that now is the time to install the reinforcement plate, the inspection plate, and the servo.
Here's where the servo goes on the underside of the right elevator:

Here is how it attaches to the inspection plate:

And here is how the unit will look once installed:

Time spent: 3.5 hours (63 total)
I drilled the counterweight. It was much easier this time since I lubricated the drill and I stopped every few seconds to clean the lead shavings out of the drill bit.
I clecoed together the understructure, trimmed a few of the stiffeners a bit more (some need to be trimmed slightly shorter on this elevator), clecoed on the stiffeners, and clecoed the understructure to the elevator skin. Like the right elevator, I did not put the bend in the trailing edge yet, so I just clecoed the skin to the understructure one side at a time for drilling.

Final drilled the skins, the control horn, and any outstanding understructure holes.
At this point I decided to look at the trim servo assembly. The instructions are pretty vague on this topic - the only instructions in the manual are to "install the system according to your configuration" and "now would be a good time while there is sufficient access". Thare are some notes on the diagram, but not much. I read ahead in the empennage manual for any more instruction and did not find any. I'm going to assume that now is the time to install the reinforcement plate, the inspection plate, and the servo.
Here's where the servo goes on the underside of the right elevator:

Here is how it attaches to the inspection plate:

And here is how the unit will look once installed:

Time spent: 3.5 hours (63 total)
Subscribe to:
Posts (Atom)